Why a Trellis Is More than Just Support
A trellis solves space problems before they start. By giving your garden vines somewhere to climb, you’re making full use of vertical space perfect for tight plots or container gardens. No sprawl, no tangles, just clean growth that goes up, not out.
But it’s not just about neatness. Vines left trailing on the ground stay damp, attracting rot and pests. A trellis lifts them into cleaner air, where they can dry out properly and avoid bite marks from whatever’s crawling through your soil. That alone makes the structure worth building.
Then there’s the look. Vines curling their way up a handmade trellis create instant charm. It adds height, movement, and texture turning a flat garden bed into a layered visual highlight. Whether you’re growing flowers or food, a trellis makes it all feel intentional and alive.
Choosing the Best Design for Your Garden
When it comes to trellis shapes, there’s no one size fits all. Each type A frame, fan, and grid has strengths, weaknesses, and a right context.
A frame designs are compact and stable. They’re great for garden beds where space is tight but vertical growth is key. Setup is simple, no wall or fence required. Best for heavier climbers like squash or cucumbers that need support without tipping things over. Downside? They can take up more visual space and might not suit sleek or ornamental gardens.
Fan shaped trellises bring a decorative touch. These are ideal for flowering vines like clematis that benefit from both vertical support and horizontal stretch. It’s not the strongest option for weighty vegetables, but if you’re planting for color and shape, fan styles deliver.
Grid style trellises are the minimalist workhorses. Mount them on fences or walls and ignore them until your peas and pole beans start climbing skyward. They’re versatile, scalable, and easy to build from basic wire or wood. Watch for sagging if you go too wide without support.
Now let’s talk materials. Wood is classic, easy to work with, and aesthetically warm. Just be sure it’s treated or rot resistant. Metal (like steel or galvanized wire) is longer lasting and better for heavier vines but may not vibe with softer, natural garden designs. Bamboo strikes a nice balance. It’s lightweight, renewable, and has an organic look. Recycled materials think old ladders or pallets are suddenly in, especially for budget friendly or rustic builds.
Finally, match your trellis style to your plant’s needs. Tomatoes (especially indeterminate types) lean toward grid or A frame builds anything that gives them vertical lift and airflow. Clematis prefer a fan or grid to weave through. Peas are happy with almost anything, but grids are usually the easiest for them to grab onto and climb.
Function matters, but so does keeping your garden looking intentional. Choose structure with your plants and your aesthetics in mind.
Tools and Materials Checklist
Building a trellis doesn’t require a professional workshop. With a few basic tools and carefully chosen materials, even a weekend DIYer can create a garden structure that’s both functional and beautiful.
Simple Tools for Any Skill Level
You don’t have to be a seasoned builder to get started. Most of the tools needed are likely already in your garage or tool shed.
Tape measure (essential for accurate cuts)
Hand saw or circular saw (depending on material and comfort level)
Power drill or screwdriver
Hammer or mallet
Garden ties, twine, or zip ties
Sandpaper or sanding block
Carpenter’s level (for straight, sturdy builds)
Essential Materials Based on Your Design
Your material list will vary depending on whether you choose an A frame, grid, or fan style trellis. Here’s a general breakdown:
Common Materials:
Wooden slats or garden stakes
Bamboo poles (lightweight and sustainable)
Metal rods or pipes (durable and modern looking)
Screws, nails, or construction adhesive
Ground anchors, brackets, or pots (for base support)
Optional Enhancements:
Waterproof wood stain, sealant, or paint
Decorative caps or finials
Mesh or netting (useful for peas or climbing beans)
Budget Friendly Sourcing Tips
You can build a trellis on just about any budget. Here are a few ideas to stretch your dollars:
Repurpose old furniture frames, ladders, or scrap wood
Check local construction sites or donation centers for free or cheap lumber
Reuse tomato cages, closet rods, or bicycle wheels for creative structure
Shop offseason garden sales for discounted materials
With the right mix of resourcefulness and planning, your trellis project can be both affordable and rewarding.
Step by Step: How to Build a Trellis

Building a DIY trellis doesn’t require pro level skills just a plan, some basic tools, and a little weekend motivation. Follow these simplified steps to bring your vertical garden vision to life.
Choose the Right Spot
Where you place your trellis matters more than you might think. Consider:
Sunlight: Most climbing plants thrive in full to partial sun.
Airflow: Good air circulation helps prevent plant diseases.
Spacing: Leave enough room between trellises or nearby plants to avoid crowding.
Measure and Cut Materials Carefully
Once you’ve selected a design:
Mark all cuts before sawing to keep your dimensions consistent.
For clean edges, use a sharp hand saw or circular saw.
Double check measurements precision now avoids problems later.
Assemble Your Structure
Depending on your materials and trellis style:
Use deck screws or nails for wood based builds.
Garden ties or zip ties work well for flexible materials like bamboo or recycled frames.
Lay out all parts before fastening to ensure proper alignment.
Secure it in Place
A sturdy base keeps your trellis both safe and effective.
In ground: Drive stakes or posts at least 6 12 inches deep.
Containers: Use heavy pots or planter boxes with added ballast for balance.
Check stability before adding plants weight will increase as vines grow.
Add the Final Touches
Small enhancements improve both durability and aesthetics:
Apply outdoor wood sealer to protect against rain and sun.
Sand rough edges to avoid splinters.
Add trim, paint, or decorative accents to match your garden’s look.
For a more detailed walkthrough, explore this in depth tutorial on how to build a trellis.
Whether you’re climbing toward blooms or tomatoes, this DIY trellis is your garden’s next best upgrade.
Plant Pairing Tips for Maximum Growth
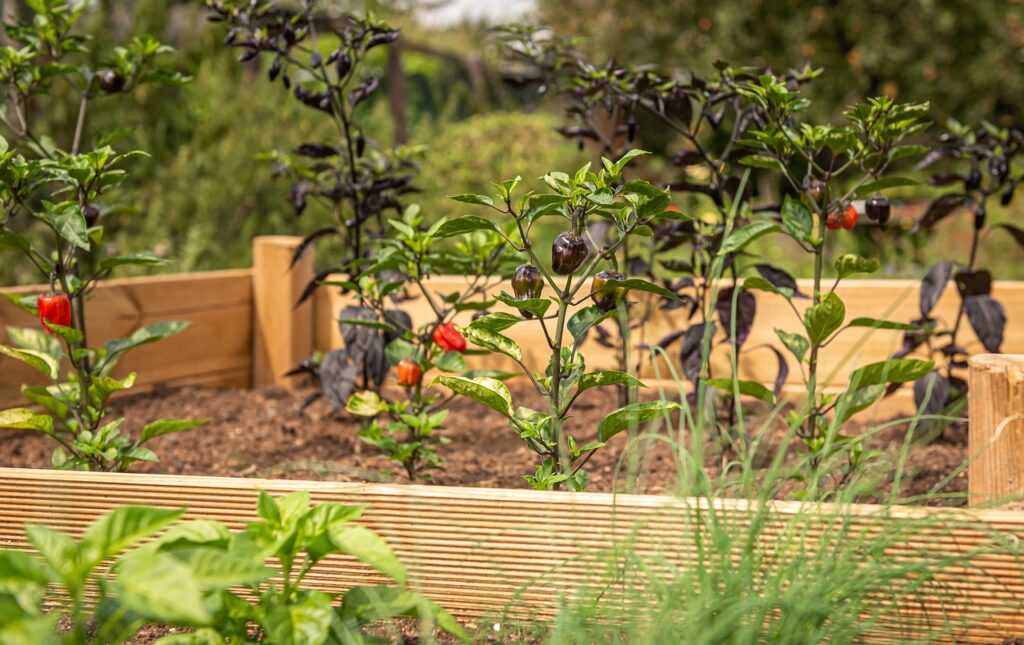
Some plants were born to climb. Morning glories, sweet peas, cucumbers, pole beans, and passionflower are natural vine climbers that thrive when they have something sturdy to reach for. When picking what to grow on your trellis, think about the weight of the fruit, the tendrils, and your climate. Light, flowering vines like clematis or black eyed Susan vine are easy starters. Heavier ones like melons or squash can work but they need more support and a bit of babying.
Once planted, training your vines early keeps things tidy and effective. Use garden ties, soft twine, or even strips of cotton fabric to gently encourage stems to grip the support. Wrap the vine loosely around the base of the trellis, pointing it in the right direction. From there, many will latch on naturally. For stubborn climbers, a little guidance every few days goes a long way.
Pruning is part art, part discipline. Snip off excessive side shoots or dense clusters to promote airflow and prevent disease. For edible vines like cucumbers or peas, selective pruning will also send more energy into fruit production. The goal is upward movement, not chaos. Train and shape regularly to let your vine shine without strangling itself.
The right plant in the right place, with a little direction that’s how you get a trellis that doesn’t just look good, but works hard too.
Keeping It Sturdy Over Time
A trellis might seem low maintenance, but if you want it to last through more than a couple of seasons, you’ve got to think ahead. First, let’s talk weatherproofing. If you’re in a damp or rainy area, use a sealant on wood and watch out for rust on metal. Hot and dry? Wood can crack so pick a UV resistant paint or stain. Snow heavy winters mean your joints and anchors need to be extra solid. No matter the climate, a coat of protection goes a long way.
Once it’s up, set a habit for inspecting it. Give it a look once a month during growing season. Spot any wobble, rot, or rust early fixes are faster and cheaper that way. Pay special attention to anchor points and places where vines put pressure on the frame.
Every season, do a bigger check. Before spring planting, tighten connections and re seal if needed. In the fall, cut back the vines, clean off debris, and prep your trellis to face winter. This simple rhythm of upkeep small checks often, deep checks seasonally keeps your trellis sturdy year after year.
Bring It All Together
Building a trellis is one of those rare weekend projects that punches well above its weight. In just a few hours, you can add structure, height, and visual pull to your garden. It’s not just about looks either getting your vines off the ground means healthier plants, more space, and fewer bugs and rot issues.
Whether you’re dealing with a small patio or a sprawling backyard, a trellis brings instant geometry and rhythm to the space. Think of it like functional art. Shade, privacy, and a vertical boost for climbing crops or flowering vines all from a humble frame you built yourself.
For a detailed guide to materials, build steps, and plant pairings, check out the full walkthrough here: build a trellis.
 There is a specific skill involved in explaining something clearly — one that is completely separate from actually knowing the subject. Quenlisa Zephoria has both. They has spent years working with sustainable home practices in a hands-on capacity, and an equal amount of time figuring out how to translate that experience into writing that people with different backgrounds can actually absorb and use.
Quenlisa tends to approach complex subjects — Sustainable Home Practices, DIY Garden Projects, Home and Garden Trends being good examples — by starting with what the reader already knows, then building outward from there rather than dropping them in the deep end. It sounds like a small thing. In practice it makes a significant difference in whether someone finishes the article or abandons it halfway through. They is also good at knowing when to stop — a surprisingly underrated skill. Some writers bury useful information under so many caveats and qualifications that the point disappears. Quenlisa knows where the point is and gets there without too many detours.
The practical effect of all this is that people who read Quenlisa's work tend to come away actually capable of doing something with it. Not just vaguely informed — actually capable. For a writer working in sustainable home practices, that is probably the best possible outcome, and it's the standard Quenlisa holds they's own work to.
There is a specific skill involved in explaining something clearly — one that is completely separate from actually knowing the subject. Quenlisa Zephoria has both. They has spent years working with sustainable home practices in a hands-on capacity, and an equal amount of time figuring out how to translate that experience into writing that people with different backgrounds can actually absorb and use.
Quenlisa tends to approach complex subjects — Sustainable Home Practices, DIY Garden Projects, Home and Garden Trends being good examples — by starting with what the reader already knows, then building outward from there rather than dropping them in the deep end. It sounds like a small thing. In practice it makes a significant difference in whether someone finishes the article or abandons it halfway through. They is also good at knowing when to stop — a surprisingly underrated skill. Some writers bury useful information under so many caveats and qualifications that the point disappears. Quenlisa knows where the point is and gets there without too many detours.
The practical effect of all this is that people who read Quenlisa's work tend to come away actually capable of doing something with it. Not just vaguely informed — actually capable. For a writer working in sustainable home practices, that is probably the best possible outcome, and it's the standard Quenlisa holds they's own work to.